What are notebooks?
In programming there is a great tool known as a notebook, essentially a programming interface that is web based (runs in a browser) and lets you easily document your code and segregate blocks of code to see the output as you progress. There are several different notebooks out there but the two we will discuss here are Jupyter and Colaboratory (colab for short).
The buttons above will take you to the respective sites for each notebook interface. To use juptyer we will need to download and install software which we will cover in the next section. Colab is developed by google and requires a google account to use. If you have a gmail account you are set up and ready.
Installing Jupyter Lab & Notebooks
Juptyer notebooks are interactive, they allow the user to write and execute blocks of code, see the results, and progress with a project seeing and changing things as they move along. The name Jupyter is said to come from the three languages it was developed to support, Julia, Python, and R.
If you worked through the previous three getting started articles you should have Python installed on you computer, which should have installed PIP the Python package manager, this is used to install Python packages. Open up a command prompt or terminal and execute the following command.
pip install jupyterlabThis will download and install Jupyter Lab. Note: if this does not work add a 3 after pip, such as pip3 install jupyterlab.
After you have installed Jupyter Lab execute the following command to install Jupyter Notebook.
pip install notebookThis will download and install Jupyter Notebook, again if this fails add a 3 after pip, such as pip3 install notebook.
Working with Jupyter Notebooks
Once installed open up a command prompt or terminal and execute the following command.
jupyter labThis will the program and open up a web browser with the Jupyter Lab home page. From here you can navigate to the folder where you want to store your notebook, once there in the launcher (the main window), click on the Python 3 (ipykernel) to create a new notebook.

The same process can be used in Jupyter Notebooks with a more streamlines interface if you don’t like all the features and find Jupyter Lab cluttered. In a command prompt or terminal execute the following command.
jupyter notebookAs with Jupyter Lab this will run the notebook program and open a browser to the more streamlined Jupyter Notebook interface. For the remainder of our work with Jupyter Notebooks we will be using Jupyter Lab. Know that you can follow along in either though.
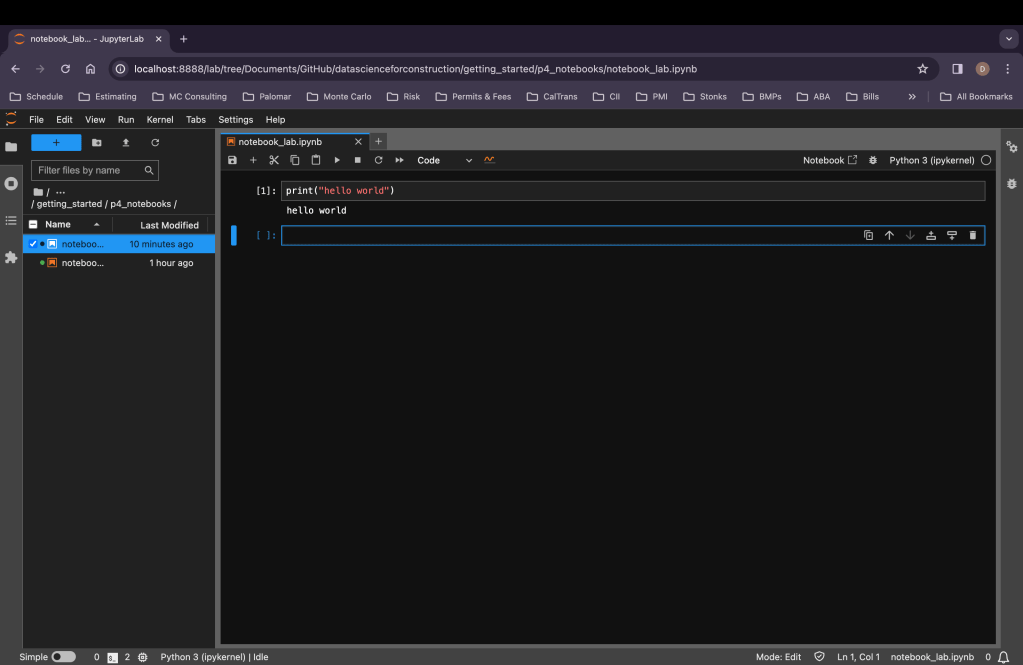
You will notice that your notebook has a cell up at the top, this is where you enter your code. In the first cell write the following code, once written hit the run button (the icon that looks like a play button on a remote, by hovering over it it should say run and advance to next cell).
print("hello world")
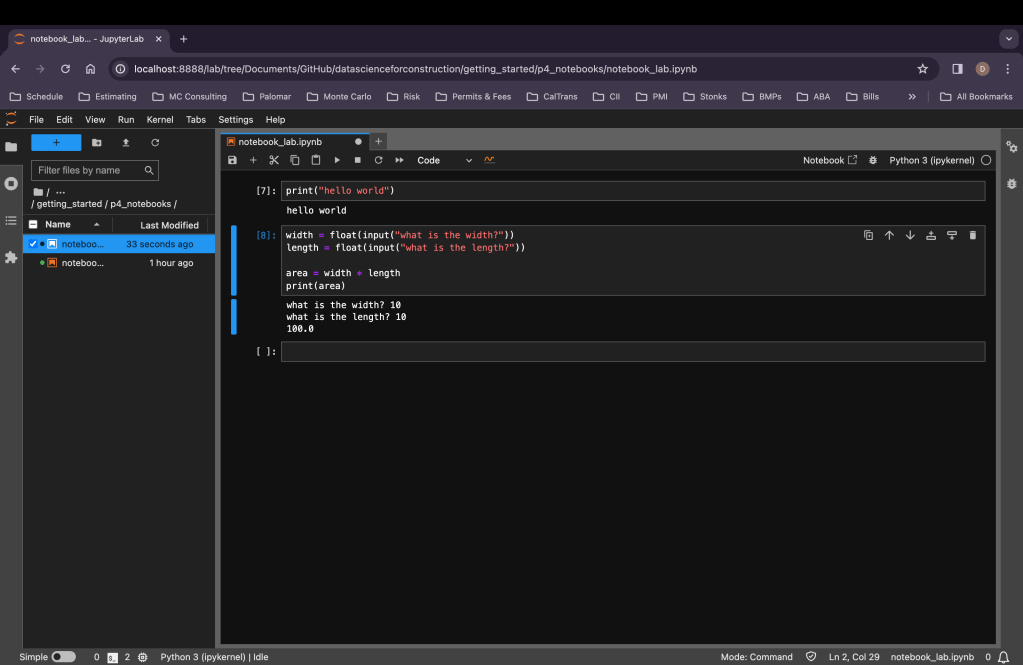
In the next cell write the following code.
width = float(input("what is the width?"))
length = float(input("what is the length?"))

area = width * length
print(area)
When you run this cell (hit the run button, the one that looks like a play button) below the cell will be a prompt for the width, enter a number here and hit enter or return, the next prompt will appear for the length. Using these two variables area will be calculated and the print() statement will print the results.
In the next cell lets create a function in python by writing the following code.
def wall_surface(width, length, height):
    perimeter = (width * 2) + (length * 2)
    wall_surf = perimeter * height
    return(wall_surf)
We create a function by starting off with def this tells Python we are writing a function we then give our function a name followed by placing parameters inside () with a : after as we did in the line def wall_surface(width, length, height):, when you go to write the next line it should automatically indent, the code you place indented under the function name and parameter will execute when you run the function. For this example we have a variable named perimeter which takes the parameters width and length, multiplies each by two and adds them together. The next variable is wall_surf which takes the perimeter and multiplies it by the height. Using the return() function we tell the function that the value of wall_surf variable is the functions output.
To use this function we call it by using the name we gave it and adding parameters into the function. Write the following in the next cell.
wall_surface(10, 20, 9)
When you execute this cell it will use the instruction given when creating the function and apply the parameters used when the function is called.

One of the great things about notebooks is the ability to document your code both by breaking it into steps but alos by adding text to note your methods. In the above image you will see that there is a bit of text in one cell between to different sets of code. When you add a new cell there is a dropdown that defaults to code, you can change this to markdown for a given cell. Markdown is a language that allows for formatting text without the use of a text editor. There are many online resources for wirting in markdown, some basics are using # will denote a heading, # for heading 1, ## for heading 2, and ### for heading 3, *text here* will italicize text, ** text here** will bold text, there is much more the markdown but this should get you started.
Visualizing you data
Another benefit of notebooks is the ability to use visualizations to see your data as you progress in transforming and analyzing it. To get started doing some data visualizations we need to import some libraries first. Libraries are collections of functions and tools that can be added to a programming language to enhances its functionality. If you have python installed on you computer you should have pip (the python package manager). Open up a command prompt or terminal and enter the follwing and hit enter. You should see the libraries begin to download and install, depending on your system and internet this could take a few minutes.
pip install numpy, matplotlibOnce fully installed write the following in a new cell in your notebook.
import numpy as np
import matplotlib.pyplot as plt
In the previous lines of code we are importing two libraries into our code, numpy which is used to handle arrays, matrices and mathematical functions, and matplotlib which handles data visualization. It is commonplace to import libraries as a shorthand alias, so for numpy we import is as np, when we need to use numpy functions we do not need to spell out numpy each time we can now use np in its place.
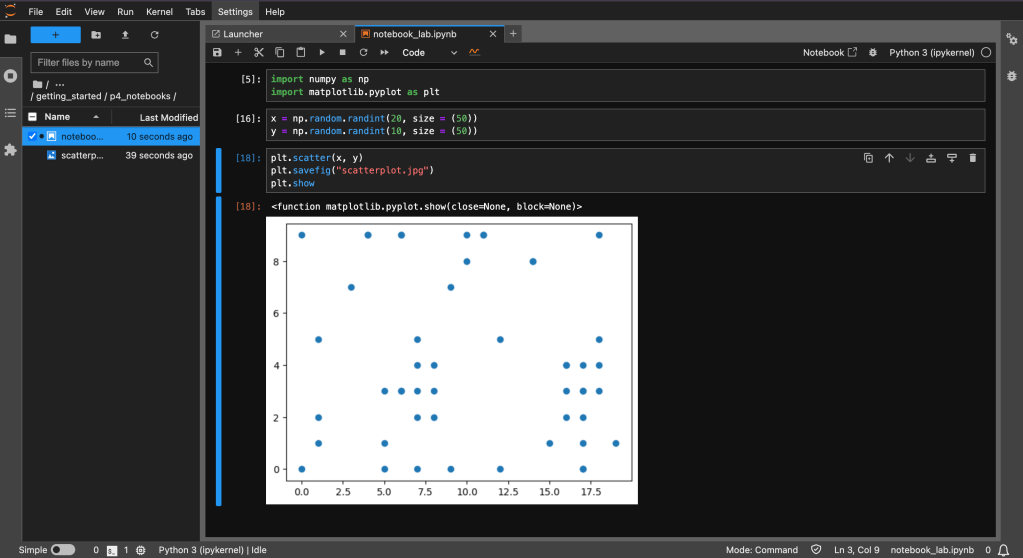
Let’s create some random data by writing the following code.
x = np.random.randint(20, size = (50))
y = np.random.randint(10, size = (50))
Here we create an x and y variable and we use numpys random function to generate random integers, in the () the number is the is the stop number, so for the x variable we are generating numbers from 1 to 20, and the size dictates the amount of numbers. These two lines give us two arrays of 50 random numbers. Nexts lets visualize this data in a scatterplot, write the following lines of code in a new cell.
plt.scatter(x, y)
plt.savefig("scatterplot.jpg")
plt.show
We call the library matplotlib with the alias plt and using the dot operator we call the scatter plot function plt.scatter(), we pass our two arrays for the x and y variables. We are going to want to save our image so using the plt.savefig() function we give our image a name, and we use the plt.show() to print the image out directly in the notebook.

Google Colab
Colab notebooks are very similar to Jupyter notebooks, they have the same file exentsion (.ipynb), the run code in cells, markdown in cells, allow for easy documentaio of your code. Where the differ though is in a few areas that will allow you to decide which one to use and when.
In Jupyter notebooks specifying which cells are markdown and which are code is slightly more difficult, when using colab the button to add a new cell are two, one for code and one for text, this makes it a bit more seamless to add text. While adding text is probably not a major deal breaker, I prefer the user interface of colab and adding text is a part of that.
The primary difference between the two is that Jupyter notebooks run on your computer’s resources, it uses the version of Python you have installed and any libraries you have installed, if you need to use a library or want to use a different version of Python you will need that installed on your computer. Colab uses googles cloud computing to run your code, most libraries are already available and there is not a need to install anything on your computer. You don’t need Python or any libraries you can just create a new notebook and start working.
When you compare the two they are very similar, Jupyter uses your computers resource and can be faster in some instances, but you can pay to upgrade colab and get faster resources. Colab is inherently more portable as anywhere you have internet and can log into your google account you can access your notebooks and run them. I personally prefer Colab over Jupyter but that is my preference.
Resources
The code and notebooks used in this articles can be found in the companion github repository by clicking the button below.
